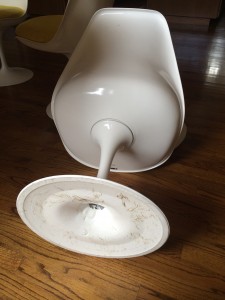
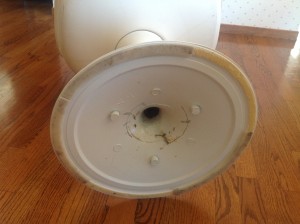
I purchased 6 vintage Knoll Saarinen tulip chairs at an estate sale. I did not want the metal base of the tulip chairs to scratch my hardwood floors. Four of the chair bases originally had embedded plastic rims which had mostly broken off, and Knoll no longer makes this plastic part.
I initally thought adhesive felt protectors would be the solution, but after calling around to several felt manufacturers, I couldn’t find anything that was curved like the plastic rim, nor could I easily buy or test a small amount of ¼” to ½” thick felt that I could cut into 15” diameter circles.
I opted to use carpet samples, cut to size and placed upside down under the tulip base. To keep the carpet edges from fraying, I applied a glue solution to the fiber edges.
Make a Compass Drawing Tool and Template
To cut out the carpet circles, my first attempt was to trace directly around the pedestal base onto the carpet sample, resulting in a 15″ diameter circle. I experimented with the circle size and decided that, to make sure the carpet didn’t show, its diameter needed to be one-half inch (½“) less than the base. In other words, the carpet is one-quarter inch (¼”) inside the edge of the pedestal base.
Warning: In this first attempt, I used a sharpie pen to trace around the base of the pedestal onto a piece of kraft paper. If you do this, be careful not to get sharpie ink on the base, as it may not come off. Try bleach immediately, or use a pencil to trace.
Now you will draw a circle of 14.5” diameter using a homemade drawing tool similar to a drafting compass.
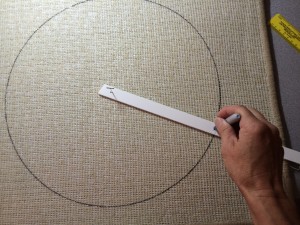
To make the drawing tool: Cut a narrow strip of foam core or cardboard so that you can use it to draw a circle directly onto the carpet sample. Near one end of the strip, mark a dot for a pinhole, and then, for a 15” base, put another dot 7.25” away. This means you will draw a circle of 14.5” diameter. Use the tip of a steak knife or an Xacto blade to enlarge the dot at the 7.25” mark. Enlarge the hole so that you can get the tip of your sharpie through it.
This photo shows me drawing directly on the carpet sample. But for practice, put kraft paper over your upside down carpet sample, stick a pin through the first pinhole dot, put the sharpie in the second hole, and draw a circle on the kraft paper. Measure your circle and check for accuracy.
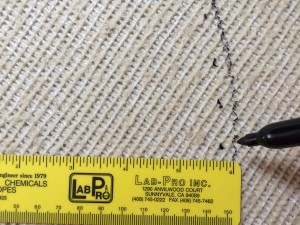
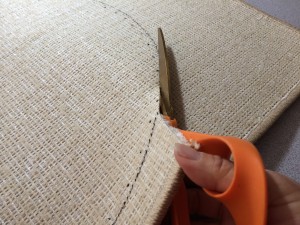
Then, use this drawing tool to draw the circle directly on to the back of the carpet sample. Cut just inside the line with a heavy duty scissor, to remove the ink. You will make a bit of lint. This photo shows the ¼ “ dotted line from my first circle, before I created the drawing tool. The drawing tool replaces your need to draw the dotted line.
Glue the Edge of the Carpet Circles
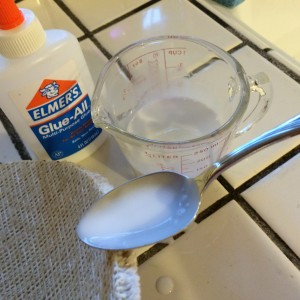
To keep carpet from fraying, professional carpet layers seal the edges with hot melted carpet glue. They have a tool to do this, but I instead used Elmer’s White Glue. Make a 50:50 solution of Elmer’s White Glue and water. For my first circle, I used one teaspoon of glue + one teaspoon of water. It mixes well in a small bowl, just stir it.
Apply the glue solution along the edge with the back of a spoon. Make sure the fibers at the edge of the carpet backing are dampened/sealed. It takes over a day to dry.
I tested the first pad for over a month to make sure there was no fraying. To glue the remaining 5 circles plus a 25″ pad for a future table, I made 100 ml of diluted glue solution, but you shouldn’t need that much.
All Done!
The glue takes over a day to dry. Once dry, set it on the floor upside down, and position your chair on top of it. I was going to glue the carpet to the underside of the pedestal base, but the chair is so heavy, it seems to stay on top of the carpet pretty well. My local carpet store in Menlo Park, CA, Menlo Flooring recommended using DriTac Flooring Adhesive, but it comes in large containers. I plan to try using my kids’ old hot glue gun or else Tacky Glue if I ever get around to actually gluing the carpet pads to the tulip chairs.
Materials Used
I got my carpet samples from Menlo Flooring. They are good guys. I ended up using a polyster fiber rather than wool because the wool latex backing seemed to crumble a bit.
My carpet samples were from the JDStaron Harcourt Collection. I didn’t fuss about the pattern because the pads will generally not be visible.
- Collection: Transitional Prints
- Design Names: Linden, Climbing Vines, Diamond Trellis
- Content: Polymer fiber
- Origin: South Asia
- Construction High Definition Printed
- Pile Height: 7 mm
- Pile Weight: 1250 g/m2
- Stain Treatment: 3M Scotchguard Treatment
Hope you found this helpful!


